

You can download a pdf of this tutorial here
Photomerge in Photoshop CS3+
This short tutorial shows the wonderful results you can get in creating a panorama from several separate photos.
Whilst the best results are always obtained by using a tripod and setting your white balance and exposure before taking your first photo with the examples I am going to use this was not the case.
These photos were taken hand held and in fact were taken inside through glass while I walked around a viewing platform.
The results by using the Photomerge tool are quite astounding as I think you will agree
.
Here are the photos which I want to merge into a panorama
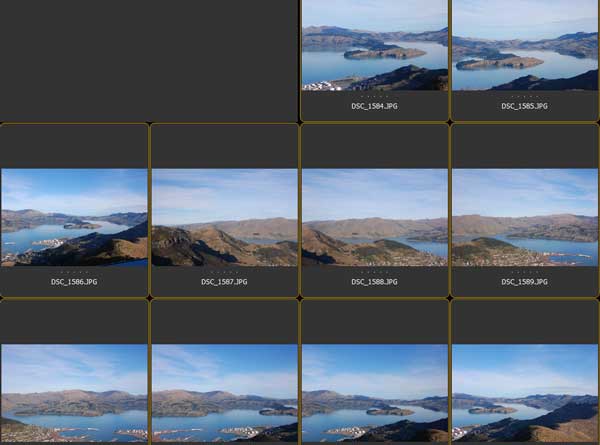
There is a significant overlap in these photos which makes a successful result a little more likely.
To create your panorama choose File – Automate – Photomerge
You can choose at this point to add open files if you already have your files open , or you can choose to browse to find the files .
There are various types of panoramas you can try – Ive used Auto in this instance and let Photoshop decide where to place the photographs but try out some of the other options and see if you get a more desirable result

Photoshop CS4 which is what I am using has more options in the photomerge feature but it works really well in CS3 as well .
I have selected the vignette removal and geometric distortion correction which will reduce the effect of any dark vignetting in each separate image which might have occurred if you had a lens hood on for instance, and the Geometric Distortion correction will reduce any lens distortion that may have occurred.
Photoshop then automatically places all your images in one new file in separate layers.
Its next step is to align the photos based on the photos content. Photoshop will analyse each photo and move and resize each layer to align them into a panorama.
Its next step if you have chosen the Blend option is to blend the photos togeter to give a seamless result.
It does this by masking parts of each photo to show only the part needed
The result can take a few minutes depending on how many photos you have selected and the size of the images.
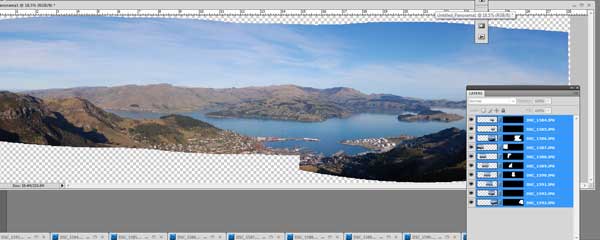
At this point now you can crop your final image and perform any other final adjustments you wish to make.
For this image I am going to use a perspective transformation to enlarge the left hand edge of the panorama , and a slight rotation to the left to allow me to make my crop as effective as possible.
I do this after merging all the layers.
Here is the result of my finished Panorama, the entire process only took less than 10 minutes and the result is very satisfying.

That tutorial rocked Lauren! I tried out the one you gave back at the Adobe Crop for my Hiking Yosemite LO and was immensely impressed with how quickly and cleanly CS3 merged my 5 photos!!!
ReplyDeleteOh lauren i feel sick!
ReplyDeleteyour pics are so beautiful and what a terrific Blog ,of corse i am creeping and i just want to walk
Oooh, I love this Lauren, I have wanted to try photo merging for a while, and I have just the panorama view I would like to take a shot of. (we have recently bought a block of land) I would love to take a panorama of the view from our new block before the house gets built and too many other houses get built around us!
ReplyDeleteWow!!
ReplyDeleteStunning tutorial...
Regards,
SBL GRAPHICS
http://www.sblgraphics.com/photo-masking_service.aspx