

Selective Colour Changes using the Color Range Tool
Tutorial for Photoshop CS+
You can download a pdf version of this tutorial here
There are many different ways in which we can change the colour of an image or part of an image using photoshop.
This method uses the simple to use Colour Range tool which allows us to not only choose one specific colour but even a range of colours if desired.
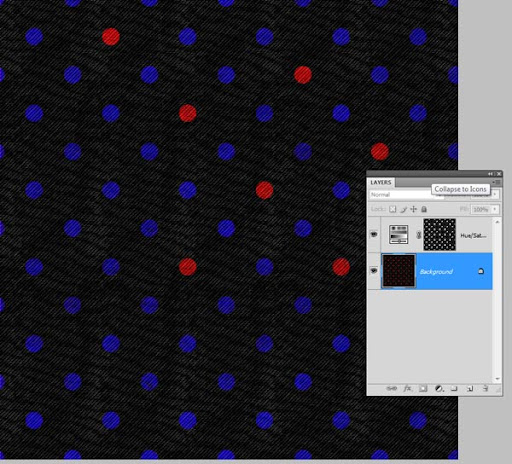
Here in my example I have a black background with red spots.
I like the background but for my layout I want to change the colour of the spots to blue.
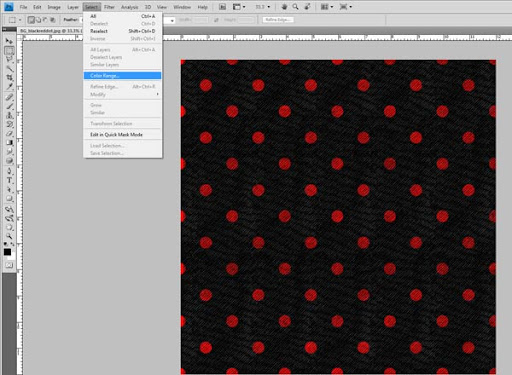
In the menu go to Select – Color Range
A dialogue box pops up and you are presented with a colour picker which you click on the colour you wish to select on your image.
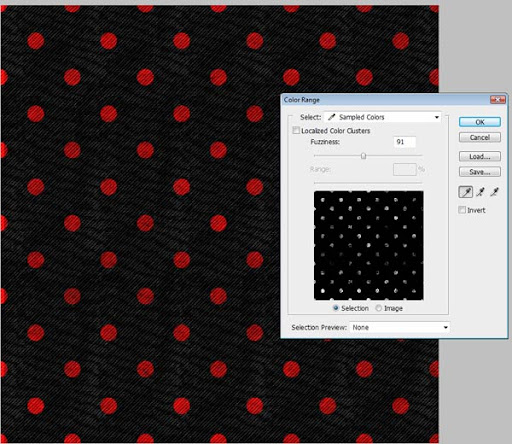
You can drag the fuzziness slider up or down to pull in more or less of the colour you wish to include in your selection, . If there are multiple shades of that colour the further to the right you pull the slider the larger the range of shades that will be included. By sliding to the left you will limit the selection to a much narrower range of colour.
In addition if you wish to include further colours in your selection hold the shift key down and click on that area to include it. If you find colours you dont want in your selection you can hold down the alt key and click to remove them.
This image is pretty simple so just dragging the slider is sufficient .
The changes are indicated in the dialoge box by the increased amount of white in the preview box
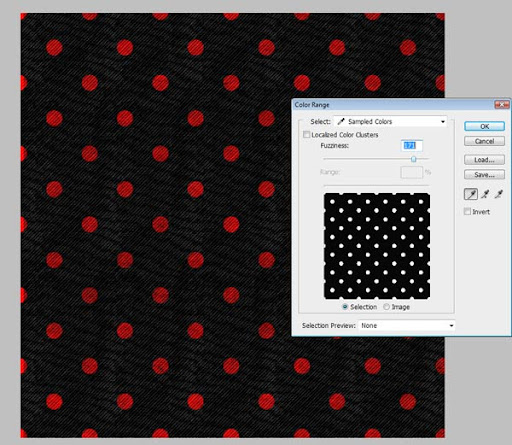
Click ok and the dialogue box will disappear and the marching ants will now show your selection.
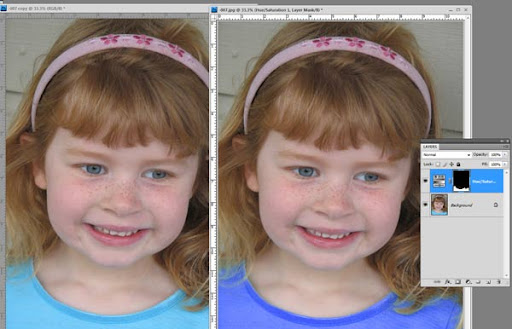
To make your colour changes you could then apply a hue and saturation change but the best way to do this is to use an adjustment layer. This leaves your original image intact but puts the changes on a new layer above.
With your selection still active , click on the adjustment layer icon at the bottom of your layers palette ( this looks like a circle that is half black and half white)

Choose the hue/saturation option .

Drag the hue slider left or right to alter the colour.
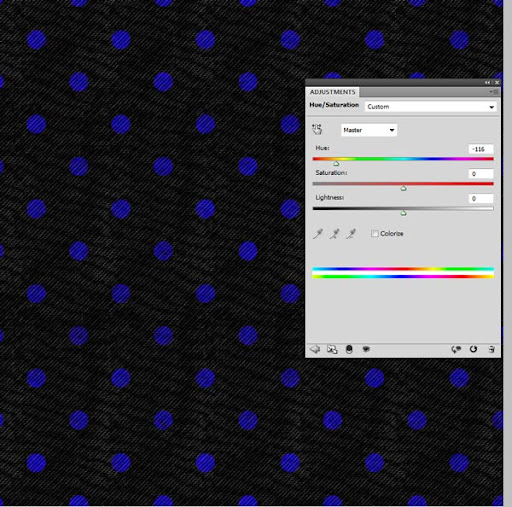
Because this is an adjustment layer your original layer still exists below untouched, and because you had a selection active when you clicked the adjustment layer icon your changes are only affecting the part of the image indicated by the selection and it has automatically created a mask on your layers palette to do this.
This allows us even more flexibility because we can paint on that mask to add or subtract some of our changes.
Change your colours to default black and white by pressing D on your keyboard and click directly on the adjustment layer thumbnail – paint black over some of the white areas to remove the colour change, - or paint white over some of the black areas to add the colour change to different parts of the image.
This method of changing colours is great for getting more use out of your scrapbook elements, it is also very useful for photos.
And the benefit of using the adjustment layer is that if your selection takes in areas of the image you dont want to change – a simple swipe over with a black brush will revert the colours back to their original.
Have fun with this method – Its also great for the selecively colourd black and white images that are so popular.
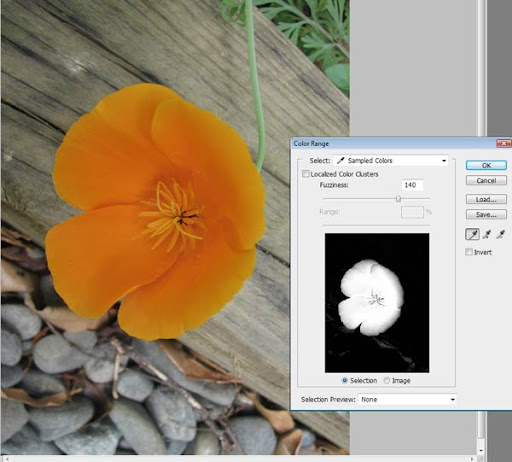
Choose the colour you wish to leave coloured,
If dragging the slider to the right still doesnt bring in all the area you want selected hold the shift key down and select another range of colours to add to the selection.
When you are happy with your selection hit ok
then INVERT the selection. ( Select- Inverse)
CS3+ users can then make their black and white adjustments using the black and white adjustment layer option.
CS2 and below use the hue saturation option and drag the saturation slider down to the left to remove the colour
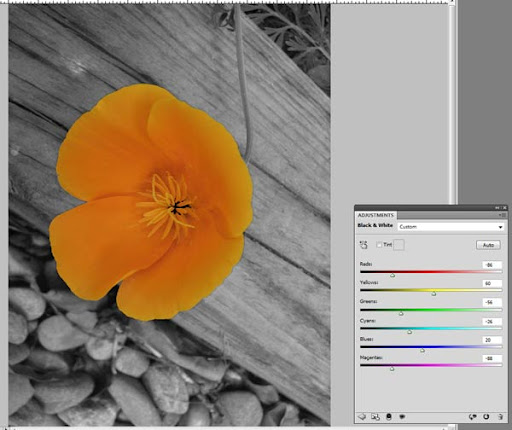
Now if there are areas you wish to bring colour back to you can paint them back in on your adjustment layer using black , or if there were areas that were included in your selection that you dont want in colour, paint those out using white.
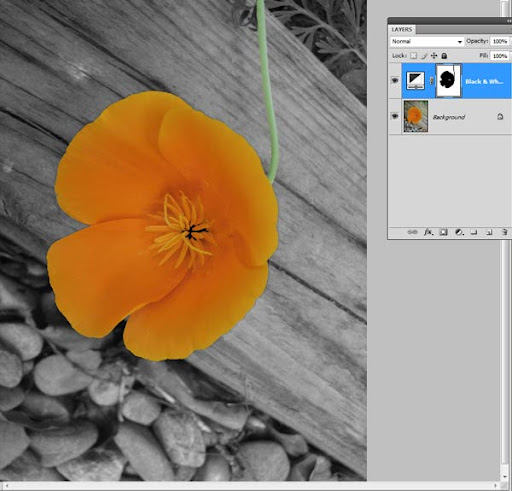
Here I have painted in the stalk to bring the green back.
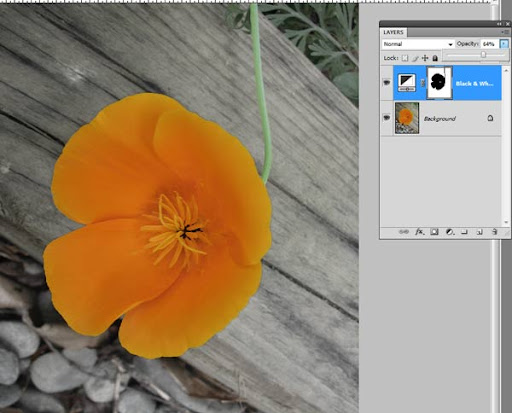
You can also play with the opacity of your adjustment layer to globally bring back just a bit of colour into your image as I have below.
I hope you enjoyed this tutorial – it covers quite a lot of ground and is useful for many situations.
It by no means is the only way to make colour changes but it certainly is a useful option to know about.
Oh I can definitely see myself using this over and over again! Thanks so much Lauren!!! I'm really loving your Technique Tuesdays :)
ReplyDeleteI so needed this tutorial. I've been using color replace with limited results. This is sooo much better and covers so many important details. Thanks so much.
ReplyDeleteI enjoy your tutorials and have learned a lot from them. I would like to subscribe to your blog, but the subscribe link on the left is not working. (I don't think any of them are working, except for the rss feed one, and I don't use that.)
ReplyDeleteAt any rate, great tutorials, and beautiful kits.
WOW! I just used this technique on my Poppy Fields Feature Friday layout to change Dave's shirt from blue to green. How cool! Thanks for doing these technique tutorials Lauren. They are awesome!
ReplyDelete