

Correcting Perspective
Tutorial for Photoshop CS2+
You can download a pdf of this tutorial here
Often when we take photos at wide angle and we are not perpendicular with the subject the resulting photo has objects with strange angles.
From CS2 onwards Adobe made it a piece of cake to fix these images using the Lens Distortion Correction Filter
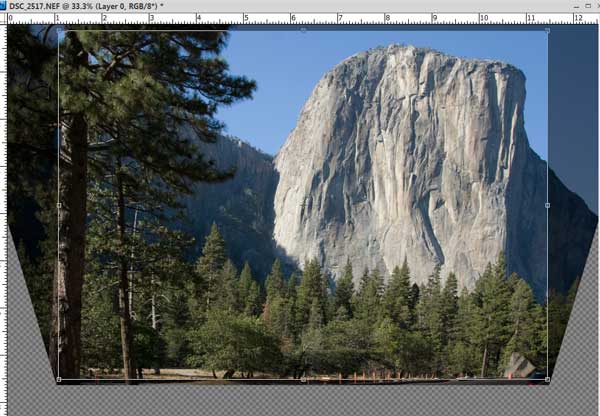
Here is my original photo

As you can see I had the camera tilted up which resulted in some trees at very strange angles!!
To fix this problem use the command Filter – Distort- Lens Correction.
The filter will open up with a grid to assist in your work

There are several types of distortion that can be corrected using this filter.
The top slider corrects distortion where the image appears concave or convex.
The second and third sliders reduce chromatic aberration. This is where your camera has some strange colours on the edges of some items ( Often you might see a blue edge to a darker item)
The 4th and 5th sliders correct vignetting – this is when you might have a darkened edge around your photos due to having a lens hood or long telephoto lens attached.
The sliders we are concerned with in this tutorial are the Transform sliders .
Your image may have either a vertical or a horizontal perspective distortion ( commonly when you are taking a photo from the ground looking up it is a vertical distortion.)
In my photo I wish to correct a vertical distortion and have the trees appear straight up and down.
The easiest way to do this is use the guides to line up a vertical line ( in this case the tree trunk)

I just slid the slider until the left hand edge of the large tree trunk appeared fairly straight using the grid as a guide .
Hit Ok when you are happy and then use the Crop tool to crop your photo.
As you can see this is a really easy method to improve your photos

As you can see you will lose some photo “ real estate” in the cropping but the resulting photo is always more pleasing. If you are good with the cloning tool you can often crop a bit wider leaving a blank area and clone in something to fill the gap .

By cloning in the bottom corners of this photo I managed to get a little more of my scene showing.

I hope you enjoyed this easy tutorial and it helps you to correct some of your photos.
Thanks heaps . .. I should have done this a couple of times.
ReplyDeleteLady Carolyn
Thank´s Lauren ...Really love your tutorials. I work with PS CS2 so I´m always glad when you work with that program
ReplyDeleteTora ;)