
Here is the little madam and her friend who came over to go trick or treating tonight.
Hannah had much more fun going with a friend!


Brushed On Quick Bits | |
| by D- Lauren Bavin | |
 | his set of 8 paintstroke images are to be used as " clipping masks" for achieving a painterly look to your photo. Simply " clip" to your photo layer to achieve a look as if you have painted your photo onto your layout. This set includes 8 different paintstroked images in .png format. Software Requirements: These images are similar to quick clicks in that they require the use of a magic wand tool, or clipping mask option in order to work. Software programs that can currently use these templates include - Photoshop 6 or higher, Photoshop Elements 2 or higher, Paint Shop Pro 7 or higher, PhotoImpact recent versions, Digital Image Pro recent versions, Picture It version 7 or higher, and some Corel Paint programs recent versions. Not currently supported - Hewlett Packard Creative Scrapbook Assistant, FotoFusion by Lumapix, or Creating Keepsakes Scrapbook Designer Program. |
WIllow Wishes | |
| by D- Lauren Bavin | |
 | A little funky and a little elegant, the colours of this kit were inspires thoughts of waterside willows. With unique elements from willow branch wreath to funky string flowers, this kit will be sure to showcase your photos. . . Kit Includes: ~1 willow paisley background ~1 willow green background ~1 painted stripe background ~1 bark brown Background ~1 fabric ribbon strip ~1 old embossed circle frame ~1 stacked pano frame ~1 string and button flower ~1 tiny flowers < br> ~1 twill hanger ~1 willow leaf ~1 willow wreathbr> File Size:15.80MB |
Elaborate News Alphabet | |
| by D- Lauren Bavin | |
 | This elegant and unique alphabet is perfect for where you wish to bring emphasis to an initial or monogram. Alphabet comes in Upper Case letters only File |
Victorian Whispers Page Kit | |
| by D- Lauren Bavin | |
 | From beautiful landscapes to portraits to heritage photos, this kit will inspire you to create magical layouts . Kit Includes: ~floral news background ~soft blue check background ~stained newspaper Background ~waterlily backgound ~1 blue feather ~1 diamante brad ~1 embossed satin ribbon ~1 old leaf ~1 paper bird ~1 pin with tag ~1 pink flower ~1 elaborate victorian frame |
Photomerge in Photoshop CS3+
This short tutorial shows the wonderful results you can get in creating a panorama from several separate photos.
Whilst the best results are always obtained by using a tripod and setting your white balance and exposure before taking your first photo with the examples I am going to use this was not the case.
These photos were taken hand held and in fact were taken inside through glass while I walked around a viewing platform.
The results by using the Photomerge tool are quite astounding as I think you will agree
.
Here are the photos which I want to merge into a panorama
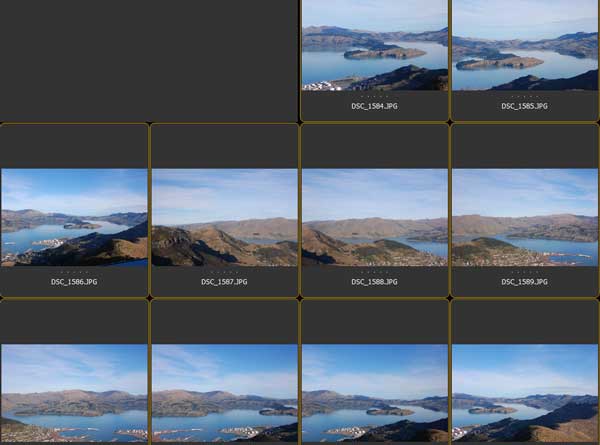
There is a significant overlap in these photos which makes a successful result a little more likely.
To create your panorama choose File – Automate – Photomerge
You can choose at this point to add open files if you already have your files open , or you can choose to browse to find the files .
There are various types of panoramas you can try – Ive used Auto in this instance and let Photoshop decide where to place the photographs but try out some of the other options and see if you get a more desirable result

Photoshop CS4 which is what I am using has more options in the photomerge feature but it works really well in CS3 as well .
I have selected the vignette removal and geometric distortion correction which will reduce the effect of any dark vignetting in each separate image which might have occurred if you had a lens hood on for instance, and the Geometric Distortion correction will reduce any lens distortion that may have occurred.
Photoshop then automatically places all your images in one new file in separate layers.
Its next step is to align the photos based on the photos content. Photoshop will analyse each photo and move and resize each layer to align them into a panorama.
Its next step if you have chosen the Blend option is to blend the photos togeter to give a seamless result.
It does this by masking parts of each photo to show only the part needed
The result can take a few minutes depending on how many photos you have selected and the size of the images.
At this point now you can crop your final image and perform any other final adjustments you wish to make.
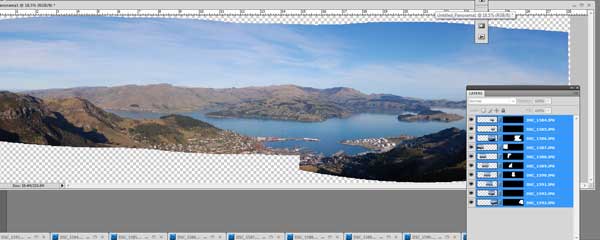
For this image I am going to use a perspective transformation to enlarge the left hand edge of the panorama , and a slight rotation to the left to allow me to make my crop as effective as possible.
I do this after merging all the layers.
Here is the result of my finished Panorama, the entire process only took less than 10 minutes and the result is very satisfying.


Japanese Blossoms QuickClick | |
| by D- Lauren Bavin | |
 | Create a layout fast with this unique QuickClick! This template includes all the layers to help you build a layout embellished with a japanese inspired blossom branch. CHoose to overlay your branch over the top of your photo and mat , or split it and use a different colour or blendmode for the portion over the photo. What is a QuickClick?! The QuickClick Template system is a wonderful new product that gives you the creative license to make unique layouts by filling in the "blanks (shapes)." The design work is done...you won't have to think about placement of your photos or accent papers because we have carefully designed these "interactive sketches" for you! Scrapbooking just got a turbo boost with this intuitive product and now you can get MORE pages done! QuickClicks include multiple pieces (12x12 PNG files*) which act like an interactive sketch - All you need to do is stack all the numbered layers in order, add in your photos and decorative papers, and fill in the shapes (easy instructions are included) for a layout that is truly yours! This template system is very flexible and can be used many times; just change the photos and papers and, voila!!, a whole new layout in no time at all. For a different look you can choose not to use the any of the |


Colourising word art using backgrounds and the Clipping Group
Tutorial for Photoshop by Lauren Bavin
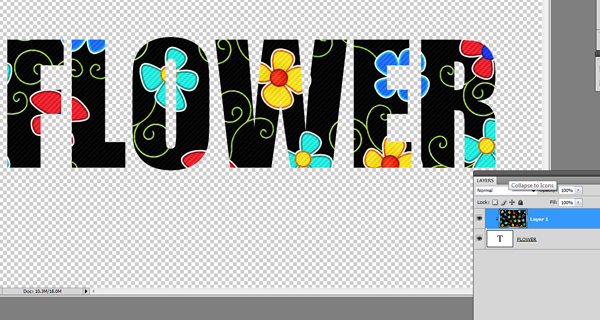
This is a really simple technique that is very useful for filling your word art with a background paper or a photo.
Open your word art and a background you wish to fill it with .
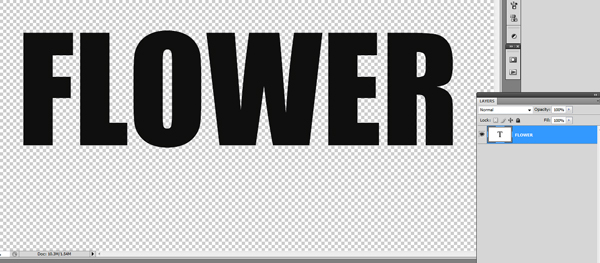
Next open your chosen background and drag it into your layout in a layer over the top of your word art.
Press the Alt- Key and hover your mouse right between the 2 layers in the layers palette
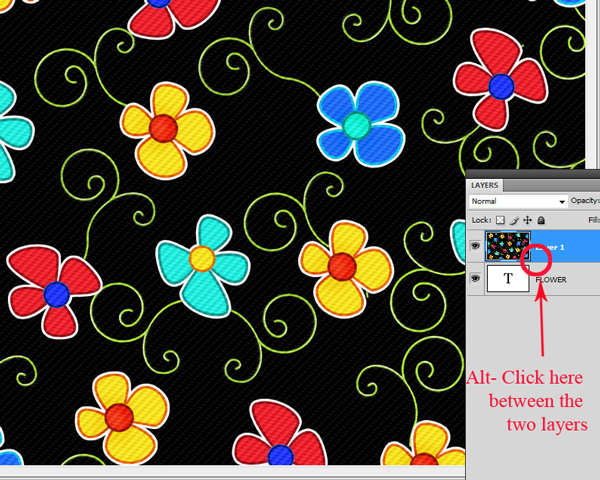
Your cursor will turn to the clipping group Icon which looks like 2 dotted circles intersecting.
Click to form the clipping group
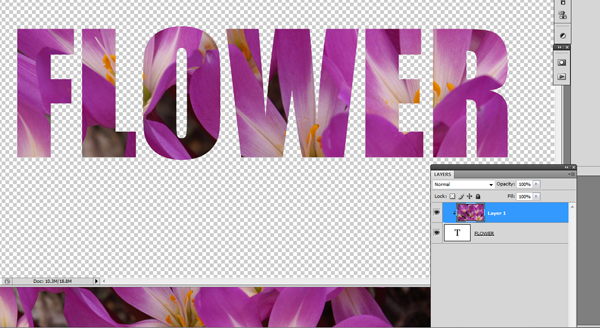
As you can see the excess portion of the background paper appears removed from the layer
You can then go and click on the move tool and move the paper around within the text . You can also resize using the transform tool if you desire.
You can use this method with a photo too
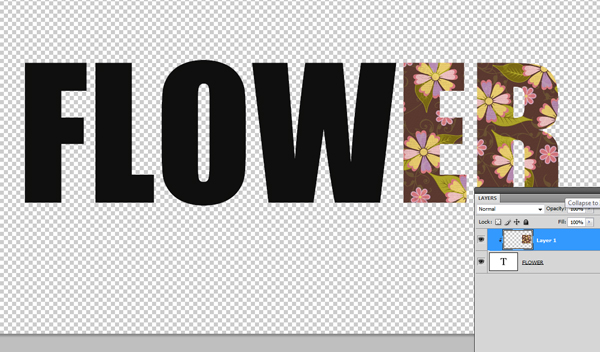
You can also add to your clipping group by dragging in more layers over the top of your original group
Here I have created my clipping group with the brown floral paper and reduced the size so it fills only the last two letters
Then using the move tool I drag another background paper over the top of the existing clipping group .
Photoshop automatically “clips” the new layer to the layers below .
I can then move the paper to where I want it to be using the move tool
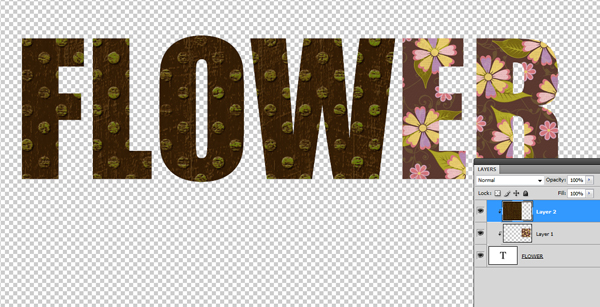
You can repeat this process as often as you desire

I hope you have fun with this very easy method of filling text and shapes.
As always with photoshop this is only one method of many for achieving any effect. Each has its own virtues and will be useful in different situations.
Date Rings Embellisment sets | |
| by D- Lauren Bavin | |
 | This set of stackable rings is perfect for showing the date in a unique way. This set includes day date and month in a set of clear acrylic and a white plastic set. It also includes 2 indicator sliders |


